Integrating NLog in Visual Studio is pretty easy. And I mean literally. I have just re-started my learning experience with C# and Visual Studio and integrating NLog was one of the things I had to do to use in my Windows service.
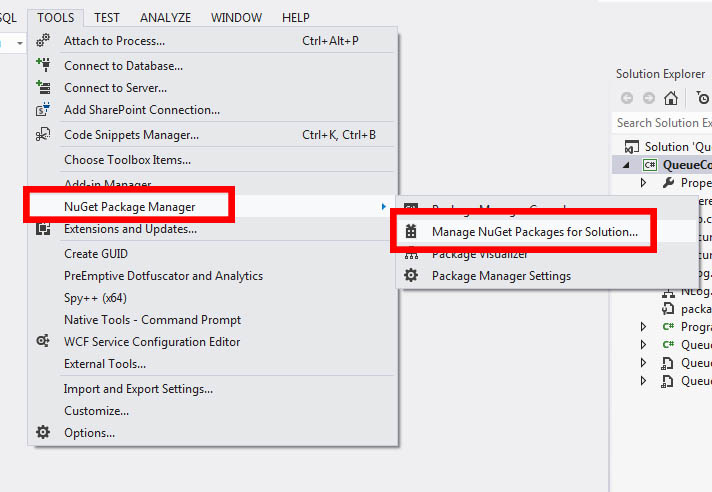
To start off. Go to Tools > NuGet PackageManager -> Manage NuGet Packages for Solution
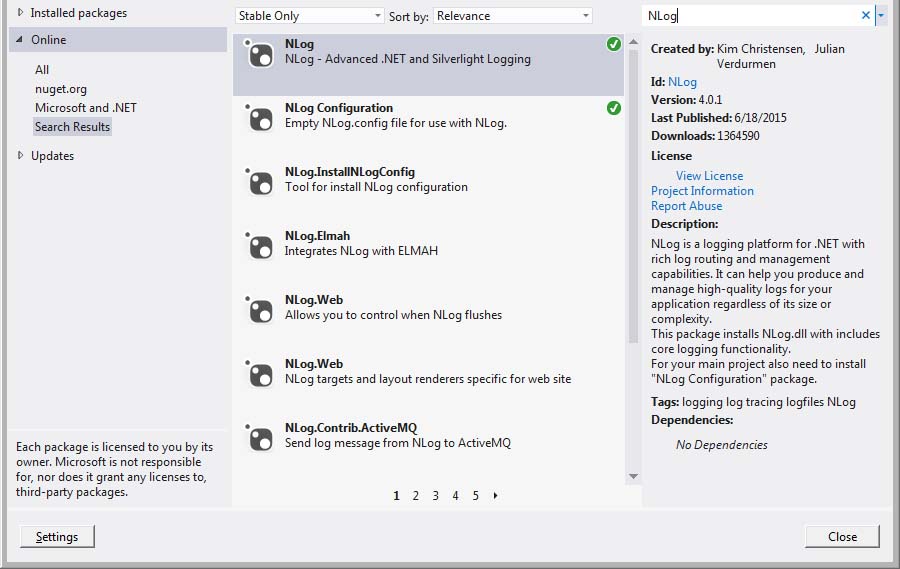
Now, on the upper right of the popup window, there should be a Search field there. Type NLog and search for it.
You should then be able to see a list of some NLog related packages. Select NLog and NLog Configuration.
Once installed, there should be a file named NLog.config. Open that to modify your preferred logging output to either File by default or through console.
The XML file should look like the following:
|
1 2 3 4 5 6 7 8 9 10 11 12 13 14 15 16 17 18 19 |
<?xml version="1.0" encoding="utf-8" ?> <nlog xmlns="http://www.nlog-project.org/schemas/NLog.xsd" xmlns:xsi="http://www.w3.org/2001/XMLSchema-instance" xsi:schemaLocation="http://www.nlog-project.org/schemas/NLog.xsd NLog.xsd" autoReload="true" throwExceptions="false" internalLogLevel="Off" internalLogFile="c:\temp\nlog-internal.log" > <variable name="myvar" value="myvalue"/> <targets> <target xsi:type="File" name="f" fileName="${basedir}/logs/${shortdate}.log" layout="${longdate} ${uppercase:${level}} ${message}" /> </targets> <rules> <logger name="*" minlevel="Debug" writeTo="f" /> </rules> </nlog> |
By default, the target and rules tags are commented out. Simply uncomment them. If you wish to have NLog output to console, change xsi:type from File to console.
That’s it!